Fleetr Quick Start-Up Guide - Platform Overview
Welcome to Fleetr!
This guide will walk you through the basic steps to get your fleet up and running and help you make the most of the Fleetr platform.
In this guide:
Getting Started
Live View
Fleet Configuration
User Management
Notification Configuration
Self Management
Editing Driver & Vehicle Information
Getting Started
After ordering your Fleetr devices and receiving your welcome email, allow approximately 24–48 hours for your devices to be activated and shipped.
Once your device is connected to your vehicle, drive for at least 3 minutes to initiate the device and begin sending vehicle data to the platform.
1. Live View
When you first log into Fleetr, you’ll arrive at the Live View map. Once your devices have been activated, connected, and have completed an initial trip, your vehicles will appear on the map.
A few things to know:
Your vehicle must complete a trip of at least 3 minutes to begin appearing on the platform.
When a vehicle is moving, its location typically updates approximately every minute.
You can select a vehicle on the map to view additional information about its current status and location.
2. Fleet Configuration
The Admin section allows Fleet Managers to configure settings for their fleet.
You can configure:
Fleet Configuration
User Management
Self Management
Fleet Configuration:
Metric System
Choose between MPH and KPH for vehicle speed and distance measurements.
Timezone
Set the timezone that should be used for your fleet.
Overspeed
Configure when speeding alerts should be triggered by setting:
Speed tolerance: How far above the posted speed limit a vehicle can travel.
Duration: How long the vehicle must remain above the speed threshold before an alert is triggered.
Example: If you set the tolerance to 10 MPH and the duration to 10 seconds, an alert can be triggered when a vehicle travels more than 10 MPH over the posted speed limit for more than 10 seconds.
Fleet Schedules
You can use these schedules to receive After Hours alerts when a vehicle is moved outside of the scheduled operating hours.
Example: I don't want my drivers to be moving any vehicles after between the times of 8:00 AM-4:00 PM on Mondays and Tuesdays.
3. User Management
User Management can be accessed from the Admin section.
Fleet Managers can use User Management to:
Add users to their Fleetr account
Remove users
Assign user permissions
Add users to specific Tags or Subfleets
When adding a user, you can choose their permission level:
Admin
Can access the platform and make changes to fleet settings and information.
View Only
Can access fleet information but cannot make changes to the account or fleet configuration.
You can also assign users to specific Tags or Subfleets to control which vehicles and fleet information they have access to.
4. Notification Configuration
Fleetr allows Fleet Admins to control which alerts and notifications they receive.
Depending on your plan and configuration, available notifications may include:
After Hours
Speeding
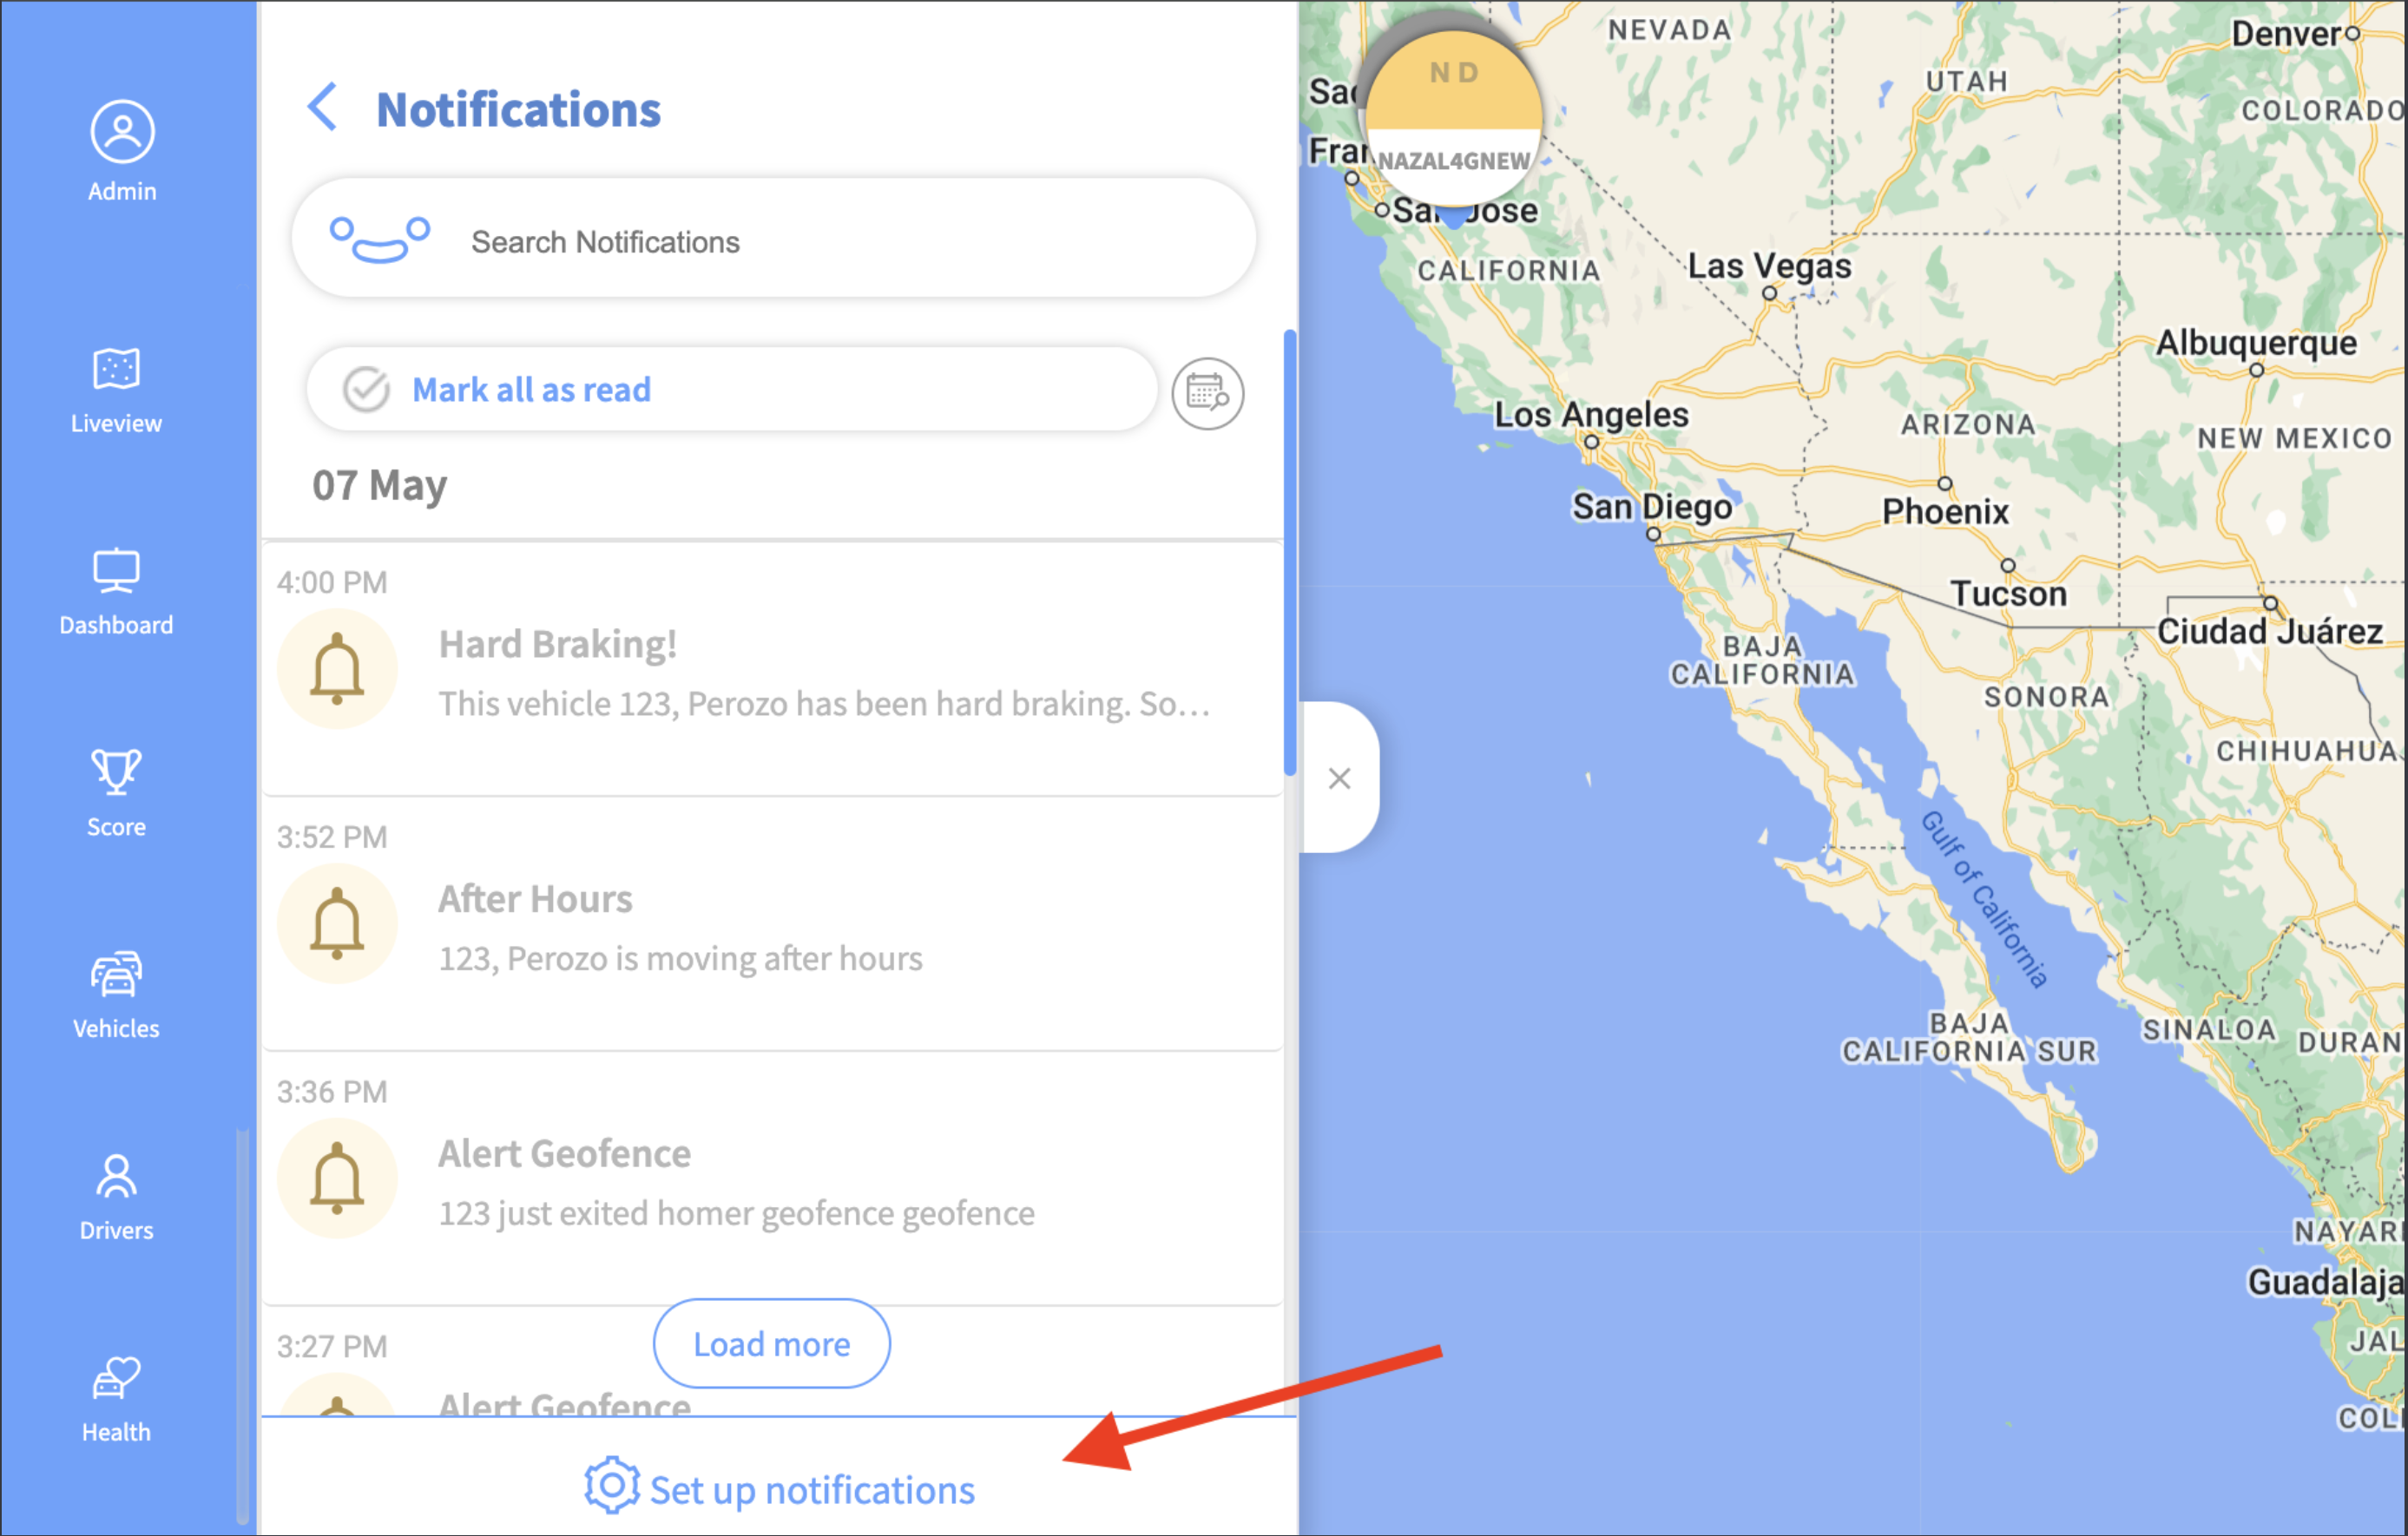
To configure your notifications:
Open the Notifications module. (A bell next to search bar)
Select Set Up Notifications.
Checkmark the notifications you want to receive.
 5. Self Management
Self Management is available from the Admin section and allows Fleet Managers to manage vehicle and device information directly from the Fleetr platform.
After a device has been connected to a vehicle and has completed an initial trip of at least 3 minutes, the vehicle will appear in Self Management.
From the Self Management page, you can:
View your fleet’s devices and vehicles
Update vehicle information
Update driver information
Make changes to individual vehicles or drivers
Automatically populate vehicle information
One-Click Autofill
In the top-right corner of the Self Management page, you’ll find One-Click Autofill.
This feature can automatically retrieve available vehicle information, including:
Vehicle Make
Vehicle Model
VIN
After the information is populated, review the details and Save your changes.
You can also select an individual vehicle or user from the Self Management page to make specific edits or changes.
6. Editing Driver & Vehicle Information
When your devices are initially activated, your account may display placeholder names such as:
Unknown Driver 1
Unknown Vehicle 1
You can update these names and other information directly through Self Management, or in the vehicles/drivers tab on the left hand side.
Select the vehicle or driver you want to edit, make the necessary changes, and save.
For vehicles, you can also use One-Click Autofill to automatically populate available Make, Model, and VIN information.
If you have questions, please reach out to our support team at support@fleetr.app or call us at (1) 415-651-7575. You can also access support directly through the app.